Detailed Succulent Care Tips
Tender / Indoor Succulent Care Tips – Echeveria, Haworthia, etc.
1) Light: light is the absolute most important factor in growing succulents and matters above all else! Good light is 80-90% of the “secret” to having gorgeous succulents. These plants come from parts of the world with abundant year round sunshine and need bright light. Sunshine hours vary across Canada, but generally speaking, a south, west, or east facing window is needed. High light species need to be placed on a windowsill (not behind blinds or screen) or very close to a window, with as much direct sun as possible indoors. Lower light species can be a little more back from the window and do best with about 3 hours of direct sun and bright indirect light the rest of the day (many can get by with less as well). A grow light can also be used. If they stretch or fade, they aren’t getting as much light as they’d like. They will grow towards the light (window); leaning can be prevented by turning the pot every week or two.
The #1 most common mistake beginners make with succulents is not understanding their light needs. Unfortunately, many areas of the country do not receive ideal/sufficient light year round for popular high-light succulent species. Many enthusiasts in Canada put their succulents outdoors in the warmer months (outdoor light is generally stronger) and supplement with grow lights in the winter, which can work well. This is why, in the “beginner recommended” section of my shop, I purposely select species and cultivars that are more forgiving to the effects of less-than-ideal light.
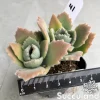
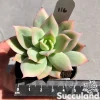
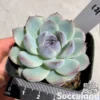
High light species: echeveria, sedum, graptopetalum, pachyphytum, crassula, aloe, agave, aeonium, kalanchoe, adromischus, cotelydon, lithops, conophytum.
Lower light species: haworthia, haworthiopsis, tulista, sansevieria, gasteria, zamioculcas, hoya.
2) Colour: colours can change throughout the year. When exposed to strong light, many succulents become more colourful (a response called “stress“). In Canada, colour can fade in winter with the reduced sunlight (especially in areas with less winter sun such as coastal BC), but return in the sunnier months. For many succulents, if you want to maintain best colour and shape in winter, a grow light should be used (detailed info on grow lights here).
3) Water / Pot: water when the soil has dried out all the way through. Do not let the soil stay constantly wet; this is the quickest way to kill a succulent. How quickly the soil dries out depends on many factors: temperature, humidity, light, soil composition, pot size (the bigger the pot the longer it will take to dry) and pot type (unsealed terra-cotta & clay pots breathe and dry quicker than ceramic or plastic). This is why there is no universal answer to the question “how often should I water?”
In my apartment, mini pots get watered once every 2-3 weeks and larger pots once a month or even less. You can tell if the soil is still moist with a nifty trick: stick a bamboo skewer in the soil to the bottom, leave it for a few minutes and remove, then touch it to the back of your hand. If it feels cool/moist, the soil has not dried yet. A cheap moisture meter can also help you get the hang of it. If a succulent is truly getting very thirsty, the leaves will start to wrinkle, and then plump up again a day or two after watering.
In good light (like a sunny summer windowsill or under grow lights), most succulents are at peak growth and like the soil to dry out completely before getting a good, thorough drink- soak the soil through. Then repeat the cycle. In cooler, lower-light spots (such as a windowsill but in winter), growth slows, and a full soak can cause root rot because the plant isn’t growing much and doesn’t take up as much water. At the same time, you don’t want the roots to completely dry out and shrivel, so water in smaller “sips” once the soil has dried.
You can water from above (a narrow spout watering can is best, try not to get a lot of water in the rosettes; blow excess water off the plant), or bottom-water and let the pot soak up moisture. The pot should always have a drainage hole. Succulents with very thin leaves need water more often than succulents with fat leaves.


4) Fertilizer: succulents don’t need fertilizer but can grow a little bigger/faster with it. Use any balanced fertilizer diluted to 1/4 the label strength once a month in the bright months or with grow lights. With fertilizer, more is not better; too much can damage or weaken plants. Organic fertilizers can also be used, but chemical fertilizers typically give better results for potted plants. Do not fertilize in winter unless you use grow lights.
5) Soil & Potting Up: use a well-draining soil mix. Succulents naturally grow in rocky soil. Mix regular peat-based potting soil or coco-coir 50/50 with drainage material (pumice- my favourite, perlite, turface, calcined clay, etc). This works well most of the time and is also called a 50/50 organic / inorganic soil blend. Use 60-80% drainage for haworthia and most cacti; they prefer a high-inorganic soil. I find most store-bought succulent/cactus mixes are not great and I do not use them; the above recipe works better. Do not use sand unless horticultural grade; play/beach sand does not drain and makes things worse.

A succulent will grow bigger/wider if planted in a larger pot. Pot up into a new pot that’s larger but not too much larger than the previous one, or put a bunch together in a bigger pot. Mini pots dry out faster, so you can use less drainage material in your soil for those.


6) Pests / Disease: always isolate plants with pests/disease to prevent spreading it to others. I like to use a LED magnifying glass to inspect my plants as it makes it easier to spot pests, which are often very small. Most pests (aphids, mealybugs, etc), can be treated by spraying the plant thoroughly with 50% isopropyl alcohol (make sure to get every part of the plant- you can dilute drugstore 70% or 90% IPA to 50% with water). Repeat one week later and then again one week after that. It should kill the pests, but continue to monitor. Look up treatment guidance or ask AI for advice on how often/long to spray for your specific pest. Alcohol is usually well tolerated but can cause damage if it sits on plants too long, so I like to put the plant in front of a fan after spraying to help the alcohol evaporate more quickly to minimize the possibility of tissue injury. Safer’s End-All can also be very effective against various pests and diseases, but it does affect the farina (wax layer) on leaves.
For fungal issues, alcohol can clear minor infections. For more serious infections such as powdery mildew, first remove badly affected leaves. Do this away from your other plants- plucking off diseased leaves can dislodge fungal spores into the air which will then disperse all over your other plants and spread the disease- sterilize your tools afterwards, too. After removing badly affected leaves, use wettable sulfur powder to knock back the infection (Safer’s brand, 1/2 tablespoon per 500ml water in a spray bottle). Repeat treatments are often necessary.
If your plant develops a bad infestation or infection, it’s usually best to just take it as a learning experience and toss it. These can be difficult to cure (even for a professional), and if/when it spreads, you’ll have a much bigger problem on your hands- it’s much wiser to ditch it and move on.
7) Outdoor Care: tender succulents can be moved outside for the warmer months if desired, provided temperature will be above 5C (they cannot be left outside year round anywhere in Canada). Do not move plants from indoors to a very sunny spot suddenly or they can sunburn. Rather, place them in a spot with heavily filtered sun or just a couple hours of morning sun, and as they acclimate to the UV they can be moved into more sun. High light succulents often enjoy about half a day of direct sun, many tolerating full sun all day. Lower light succulents should be kept mainly in bright shade or heavily dappled sun. Place under cover/protect from rain in the wetter spring and fall months, or if you live in an area with high humidity or more summer precipitation. Remember, they need to dry out between watering, even when it’s hot. In cool temperatures (5-15C), water sparingly/in sips. In an extreme heatwave, move into a shady spot. In outdoor conditions, succulents may develop a stress response and vivid colours.
Cacti – Indoor Care Tips
Follow the same care instructions as high-light indoor succulents. The only difference is cacti are even more drought tolerant than most succulents, so they can go even longer without water. Most cacti are very slow growing and more resistant to etiolation in winter than succulents, making them particularly good windowsill plants.
Hardy / Outdoor Succulent Care Tips – Sempervivum (Hens & Chicks), Sedum, etc
1) Temperature: ensure that the hardy succulents you purchase are rated to be hardy in your hardiness zone.
2) Light: plant in full sun with at least 4 hours of direct sun per day, preferably 6 hours or more.
3) Water / Pot: outdoor succulents do not need much watering. If you live in an area that is dry and hot in the summer, water them once every week or two. Plants in pots typically need water more often than plants in the ground, especially if the pot is small.
4) Fertilizer: hardy succulents don’t need fertilizer, but a little bit of extra nutrition in spring can boost growth & size (dilute fertilizer 1/2 or 1/4 label strength, or use a bit of compost/organics).
5) Soil: plant in well-draining soil. A raised bed amended with extra drainage material (gravel, pumice, etc) works well. If you live in an area with high precipitation, especially in winter (such as coastal BC), it is important to make sure soil drainage is good, otherwise they may rot. Note that some hardy succulents are perennials and will completely die back in the winter, returning in spring.
6) Pests/Disease: pests aren’t common other than aphids. Blast them off with a hose, or use insecticidal soap spray. Safer’s End-All also works well. Deer/rabbits/rodents sometimes eat succulents, so try to prevent their access to the plants. Use fungicide spray or sulfur for any fungus/mildew issues.
Cacti & Agave – Hardy / Outdoor Care Tips
There are many species of hardy cacti and agave that can be grown outdoors in various regions of Canada. Follow the same care instructions as outdoor hardy succulents but note the following:
1) Moisture: cacti & agave are much more sensitive to excessive moisture than hardy succulents. Unless you live in a semi-arid region (e.g. southern Alberta or Kamloops BC), moisture levels must be accounted for to prevent rot. Even in these dry regions some care must be taken choosing the right spot/soil. Preventing excess moisture can be achieved by 1) planting in a pot & moving under cover in wetter months, 2) planting in a spot sheltered from rain (e.g. under a covered area), or 3) planting in raised beds using very fast-draining soil with lots of inorganic/drainage material. For example, some enthusiasts have had great success planting cacti in rainy-winter Vancouver by planting them in raised beds made up almost entirely of pea gravel. If they were planted in normal garden soil, they would surely rot.
2) Sun: they like full sun, 6+ hours per day and can handle sun all day long.
3) Hazards: many species can grow quite large, and bear large spines. Despite their beauty, planting in an area where pets/kids will be is not recommended.
4) Cactus winter appearance: it is normal for hardy cacti to look a little shrivelled/shrunk or to “flop over” in the cold of winter- they do this so that when it freezes, their cells won’t burst/die. When the weather starts to warm in spring, they will “plump up” or “stand up” again.